Shortcuts: Compression/X11 | Using keys | Changing/removing keys | Host key management | Key forwarding | scp & rsync | sshfs | Tunnelling and port forwarding | SOCKS | Automating | Config | ProxyJump | ControlMaster | Unstable Network | Further reading | Admin
The Basics
Secure Shell (ssh) is used to log in to a remote machine ("host") from a local machine. The local machine can be a server, your UiO office machine, or your home machine. The ssh programs comes bundled with most Linux distros and with Mac OS X. For windows PuTTY is a popular and free ssh client with a graphical user interface, recent Windows-10 machines can also be set up with ssh.
Apart from ssh, there is also scp and sftp for transferring files. Also, ssh can be used as a transport mechanism for a number of network services.
The examples in this text is from using ssh on a Linux-type client. With PuTTY you will find the same functionality in menus and checkboxes, etc. There is also a good introduction to key management with putty here.
To get started, fire up a terminal window and use the following command (don't type the dollar sign):
$ ssh username@host
where host is the DNS address or IP number for the remote machine (host) you want to log in to, e.g. login.uio.no; and username is your user name at that host. The username@-part can be dropped if you have the same user name at both ends, and will henceforth be dropped from this text. (You can also put this in the config file.)
Sometimes, a warning will appear informing you that the "The authenticity of host (blah-blah) can't be established". In most cases you only need to confirm the connection (type yes), and you will not be asked again (for this hostname). See also the discussion below.
You will then be prompted for your password. Type it and press Enter, and you will be greeted by the remote machine's shell prompt (gothmog in the example below, this can vary):
$ ssh login.uio.no
hpverne@login.uio.no's password:

Welcome to login.uio.no!

gothmog:~ $
The data you send over the net with ssh is encrypted. Even if someone could tap the wire (or wifi), they can't listen in on the communication, or impersonate you.
If you are on an external network and want to log in to UiO machines other than login.uio.no, you will need to use a ProxyJump. See below.
Compression and X11 forwarding
In many cases you will benefit from compressing the data going over the ssh connection. Use the -C switch:
$ ssh -C host
If you want to use X11 programs on the remote host, use this command (compression recommended):
$ ssh -C -X host
or sometimes
$ ssh -C -Y host
X11 forwarding will sometimes fail for various reasons. Debugging X11 problems is beyond the scope of this article. If you wish to use X11, x2go is suggested.
Compression adds some CPU load and latency, and is not very useful for interactive use. X11 forwarding may benefit from it, and file transfers (see below), unless the files are already compressed. It boils down to where the speed bottleneck is. You'll just have to try it out it see what it does for you!

Using Keys
You can log in without typing your password every time, by creating and installing a public/private key pair. The keys match only each other: You install the public key on the server, and you can log in by presenting the private key.
Run ssh-keygen to generate the keys. USIT now recommends «ed25519» type keys, like this:
$ ssh-keygen -a 100 -t ed25519
Generating public/private rsa key pair.
Enter file in which to save the key (/home/hpverne/.ssh/id_ed25519):
The default filename is usually OK, just confirm by hitting Enter. Next, you will be prompted for a passphrase.
Enter passphrase (empty for no passphrase):
Do use a passphrase! It can be a full sentence, including space characters. If you need to write it down, do so on a private note. You will have to type the passphrase twice, for confirmation.
Note that you can change the passphrase later:
$ ssh-keygen -p
Next, add the public key to the file ~/.ssh/authorized_keys on the remote host. If your home directory is the same on both machines (eg. your UiO home directory), that is easy:
$ cat ~/.ssh/id_ed25519.pub >> ~/.ssh/authorized_keys
$ chmod 600 .ssh/authorized_keys
Otherwise (e.g. your are working on your laptop or home computer):
$ ssh-copy-id login.uio.no
If this fails, you will have to fix this manually (type your password when asked to do so):
- Copy the public key to the remote host (login.uio.no):
$ scp .ssh/id_ed25519.pub login.uio.no:tmp.key
-
log in to the remote host, add the key to the file .ssh/authorized_keys:
$ ssh login.uio.no
gothmog$ mkdir .ssh
gothmog$ cat tmp.key >> .ssh/authorized_keys
gothmog$ chmod 600 .ssh .ssh/authorized_keys
gothmog$ rm tmp.key
Adding the key to the keyring
Now, connect to the host again (with ssh). With a bit of luck, a window will pop up asking you to type your passphrase. Unfortunately, this will look like a password prompt, but type the passphrase you chose when you created the keys:

If successful, your private key is loaded into the memory in the keychain or keyring manager. The next time you want to use ssh, it will receive the key from the keyring manager, and you will not have to type the passphrase or password again until you log off.
Some keyrings can be set up to be opened with your password when you log in. If that is the case for you, you may not be asked for the passphrase ever again!
Using the agent
If your computer doesn't run a keyring manager, you'll be asked to type the passphrase at the command line. That is not so useful, as it will not be loaded into memory for next time use. But don't worry, ssh comes with it's own key manager, or agent:
Check if you are already running it:
$ ssh-add -l
If this replies "Could not open a connection to your authentication agent", you need to start the agent:
$ eval `ssh-agent`
This will start the agent and set the proper variables in the shell. Now load the key:
$ ssh-add
After typing your passphrase, the key loads into the agent memory, and is available for the next ssh session too. Check:
$ ssh-add -l
256 b5:2a:(...):a4:e7 minion@gru (ED25519)
This shows the "fingerprint" of the key loaded to the agent. Now try logging in:
$ ssh login.uio.no
When loaded into the keyring manager or agent, the key is available for all programs that uses ssh authentication. The list includes
- ssh: Doh!
- scp: Secure Copy
- sftp: Secure FTP
- rsync: Remote Sync, for "smart" transfer of data.
- FastX: X11 with remote desktop-like sessions.
- X2go: X11 with remote desktop-like sessions.
- sshfs: Share a folder on the remote host to your local machine (see below).
- others...
Changing and Removing Keys
The file ~/.ssh/authorized_keys on the remote machine (e.g. login.uio.no) is a text file, and contains one line for every key that has access to this account:
ssh-rsa AAAAB3NzaC1(...)2ox6XRL hpverne@teodor
First comes the type of key, then comes the public key itself – a long string of characters. Anything after the key is a comment. The comment is useful to identify the key, and you can write whatever you want there. Also, the line can start with some rules restricting the use of this key.
To prevent a particular key from accessing your account, simply delete the corresponding key line in ~/.ssh/authorized_keys. This is important if your laptop is lost or stolen, or the key or your computer or home directory has been compromised! However, as the key was encrypted, the thief/hacker will have to guess the passphrase, and that should give you some time.
Similarly, if you forget the passphrase, simply delete the local key files, and create a new key pair and install the public key, as described above. Remove the old keys from ~/.ssh/authorized_keys.
If you edit ~/.ssh/authorized_keys, make sure there is a newline character at the very end. The file should be accessible only for yourself (mode 600).
Host key management
Host keys are private/public keys used to identify machines. Each ssh server has a unique public/private key pair, or several pairs. (Not always unique. Machines in a cluster will often use the same keys).
When you connect to a remote host for the first time, you will usually be asked to accept the (public) host key for that host. For subsequent connections the ssh client will use this key to verify that you actually connect to the same host. This will protect you in cases where some malicious third party is able to intercept the traffic (so-called man-in-the-middle attack).
Sometimes, you will meet (some version of) the following error message when you attempt to log in:
WARNING: REMOTE HOST IDENTIFICATION HAS CHANGED!
(....)
Someone could be eavesdropping on you right now (man-in-the-middle attack)!
It is also possible that a host key has just been changed.
This usually happens when the server is reinstalled, and the host keys are regenerated.
If this happens, see if you can verify that the remote machine is reinstalled. Did you receive some email or other notification that this would happen? Sometimes, the "fingerprints" for the official keys can be found on the web, as e.g. for the Sigma2 systems. You can also contact the admins for the remote system and simply ask them!
If you are confident the new key is genuine, you can remove the old key and reconnect to get the new. You can edit the host key file manually, or use the following command:
$ ssh-keygen -f host-key-file -R remote-host
The error messages quoted above will often tell you more details, i.e. the actual name of the key file.
On UiO, all public host keys are collected and merged to a central host key file. This file is redistributed to all Unix machines. Thus, you will rarely see these host key messages if you use ssh between UiO hosts.
Key forwarding
If you log in from e.g. your home machine to login.uio.no with a private key, you can ask ssh to forward the key, i.e. make it available for ssh commands on login.uio.no as well. You do this with the -A option:
$ ssh -A login.uio.no

gothmog$ ssh mimi
If the key from your home machine is recognized on login.uio.no, it will also be recognized on mimi (as your home directory is the same), the second ssh command will also proceed without asking you for a password.
Note that key forwarding has security implications. Use it only when you need it, and only to machines were you trust the administrators (root). UiO machines should be OK.
scp and rsync
One common way to use ssh is to copy files. The simplest way is with scp. It works pretty much like the usual Unix copy command (cp), but you specify a remote file as hostname:/path/to/file. A few examples:
Copy a file from your current working directory to your home directory on UiO:
$ scp thisfile.txt login.uio.no:
Copy thatfile.txt from Astra to the /tmp directory on the local machine:
$ scp login.uio.no:/net/hypatia/uio/fs01/astra/astra-01/username/thatfile.txt /tmp/
Scp can also copy a directory recursively (-r), but if you need to copy a large directory structure, you are better off with rsync. rsync works similarly to scp, but has the added benefit of being able to catch up if the copying gets interrupted. For example, to copy thisdir from Astra to your current (local) directory:
$ rsync -av login.uio.no:/net/hypatia/uio/fs01/astra/astra-01/username/thisdir .
The -a option means "archive" mode, ie. copy recursively, preserve file modes, timestamps, etc; while -v means "verbose", report the progress.
Note the absence of a trailing slash ('/') on thisdir. This way the top directory (thisdir) will be recreated on the target. If you add the slash, rsync will copy the contents of thisdir, but will not copy the directory itself:
$ rsync -av login.uio.no:/net/hypatia/uio/fs01/astra/astra-01/username/thisdir/ .
This is similar to (but not quite identical to) .../thisdir/*.
If a large file transfer is interrupted (it happens!), you can restart it with the same rsync command (with the same working directory), and rsync will carry on from where it was interrupted. It will also find files that have changed since last copy, and copy them again (overwriting files in target).
To use compression with scp and rsync, use the options -C and -z, respectively.
Incidentally, rsync works just as well with only local files, and can then be used for the same purpose: Synchronizing large datasets.
SSH File System
Sometimes, you want to access files on the remote machine directly, i.e. as a network drive. You can do that with sshfs, the ssh file system.
On Linux, you may have to install the sshfs package from your distro's package manager. On a Mac, download and install sshfs and fuse from this page. For Windows, see below.
Create a mountpoint, an empty and local directory where the remote filesystem will be hooked up:
$ mkdir /sshfs/my_username
As an example, we'll use the Astra storage, which is only available on login.uio.no. You can connect to this filesystem ("mount it") with commands like this:
$ sshfs login.uio.no:/net/hypatia/uio/fs01/astra/astra-01/my_username /sshfs/my_username
The files under /net/hypatia/uio/fs01/astra/astra-01/ on login will now appear under the mountpoint, /sshfs/my_username/ in the above example.
If you're not on the UiO network and need to reach a machine other than login.uio.no, mimi or pingo, you will have to specify a "ProxyJump", an intermediate proxy machine. E.g:
$ mkdir /sshfs/work
$ sshfs -o ProxyJump=username@login.uio.no serac.uio.no:/work /sshfs/work
The connection should be persistent between logouts, but you will have to remount it after a reboot or network disconnect. You can also un-mount with this command:
$ fusermount -u /var/tmp/mysshfs   # (Linux)
$ umount /var/tmp/mysshfs          # (Mac)
Note: On a Mac, it might be necessary to override the user-id when mounting:
$ id
username(XXX) ....
$ sshfs server:/dir localdir/  -o uid=XXX
That is, use the "id" command to find your numerical ID (uid), and add the option to sshfs to use this uid for all remote files.
The mountpoint
The mountpoint can in principle be any directory you own. It should be empty, or the files there will be hidden when the remote filesystem is mounted.
Furthermore, we strongly recommend you use a mountpoint on a local filesystem, rather than on your network home directory. On pingo, mimi, etc, you can create your own directory for this purpose as /sshfs/my_username, as seen above.
A mountpoint in /tmp or /var/tmp/ works too, but directories you create here may be removed from time to time.
On your private machine or laptop, you have a local home directory, and you can just use a mountpoint wherever you like.
SSHFS for Windows
An implementation of sshfs for Windows can be found here. Follow the instructions to download and install WinFsp and SSHFS-Win.
To mount your network home directory, use the File Explorer as shown on the web page, or the command line:
net use N: \\sshfs\my_username@wessel.uio.no
Note: Your UiO network home directory is customarily know as M:, but using this driveletter might interfere with automatic setup (in particular if you have a Windows-10 laptop set up by the UiO IT staff). It is suggested to use some other driveletter.
To mount an absolute directory (not relative to your home directory), substitute sshfs.r for sshfs. For example, to mount your Astra drive:
net use z: \\sshfs.r\username@login.uio.no\/net/hypatia/uio/fs01/astra/astra-01/username
See the SSHFS-Win README page for more information.
Bypassing network limitations
A common problem is network services that are only available from specific IP-adresses (networks). This could be for security reasons, or because the service is subscription-based. For instance, if one tries to access the Scopus database from outside the UiO network the following error message is shown: "You are outside your institution's network."

SSH offers two ways to get around this (there are many others): SSH tunnels and SSH Socks proxy.
SSH tunnelling and port forwarding
TCP ports, a quick introduction
Services on the internet is accessed by ports. To use a service, you need to know the address of the service, and the port number. Actually, for most services the port number is implicit and you don't have to worry about it.
| Service | Port | Description |
|---|---|---|
| http | 80 | Hyper-Text Transfer Protocol, ordinary web access |
| https | 443 | Secure http |
| ssh | 22 | Secure shell |
| rdp | 3389 | Remote Desktop Protocol |
It is possible to run a service on a non-standard port, in which case you have to specify it, eg. http://www.example.com:81 or ssh -p 443 login.uio.no . The latter example is functional, and can be handy if port 22 is blocked by some firewall. The "login" nodes don't run a web server, so they can hijack port 443 for this purpose.
Setting up the tunnel
Let's start with an example: Say you want to use Remote Desktop from your home office computer penny to the terminal server geo-all-hiperf.uio.no. The official guide says you need MS Authenticator to do this, and that you need a "connection file", as you are outside the UiO network.
But you can also do this with an ssh tunnel, without a connection file, and with any 2FA method you prefer. The tunnel will make the connection appear to come from inside the UiO network.
To set up the ssh tunnel from penny to login.uio.no (a host on the UiO network), use this command:
$ ssh -L 3389:geo-all-hiperf.uio.no:3389 login.uio.no
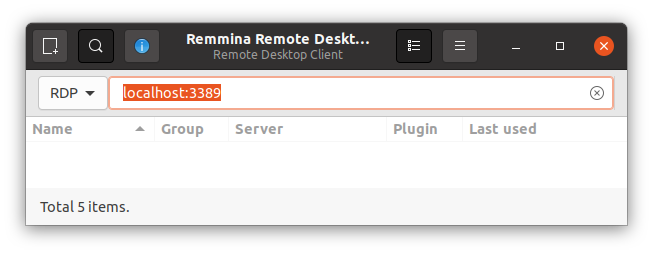
Log in as usual (using 2FA). Then, start up your Remote Desktop client program and connect to localhost at port 3389. If you prefer Remmina (in Gnome), it should look like this:
If you prefer to run a client from the command line, you can try (in a different terminal):
$ xfreerdp -g 1024x800 -u uio_username -d uio localhost:3389
What happens here is that the RDP client will open a connection to localhost (penny), at port 3389 (incidentally the default port for RDP). Your ssh client listens at this port, and forwards the traffic through the secure connection to login.uio.no, and further to geo-all-hiperf.uio.no:3389 (still the default port). For the remote server (geo-all-hiperf), the connection appears to come from login.uio.no. The RDP traffic will not be blocked, as it's all inside the UiO network.
You will probably receive a warning about "Certificate Name Mismatch". This is to be expected, because you are essentially lying to your rdp client about the name of the server you are connecting to.
Non-default port?
You don't need to use the default port on the local host, and in some cases you are not allowed to. The local port number must be higher than 1024 (unless you are root), and it must be free (no other programs using it).
If you want to use (say) port 3390 for RDP, the commands above would be
$ ssh -L 3390:geo-all-hiperf.uio.no:3389 login.uio.no
$ xfreerdp -g 1024x800 -u uio_username -d uio localhost:3390
You will get an error message from ssh if you try to use an illegal or busy port.
ControlMaster
As seen above, you can run other TCP services through an ssh tunnel, but what about tunneling ssh traffic through another ssh connection? SSH has a mechanism for that too, using a ControlMaster. This is easiest to manage in the config file, use a stanza like this:
Host *
        ControlMaster auto
        ControlPath /tmp/%r@%h:%p
        ControlPersist 10m
When you first log in, ssh will set up a socket file (the ControlPath), subsequent ssh invocations (to the same remote host) will use this socket and connect through the already existing ssh connection.
As you are already authenticated, the new connections won't need to authenticate again! This is particularly useful when using 2FA, or if you don't (can't) use keys.
The ControlPersist statement means the tunnel will stay open for the specified time even if you log out. That's nice if you accidentally log out.
SSH Socks proxy
SSH tunneling as described above is great for many applications where you only need to access one remote server on a single port. It's possible to forward several ports, but it quickly gets cumbersome if you want to access several different remote servers on multiple ports. This is fairly common when you visit a web page, as images and web links can refer to other addresses.
An SSH Socks proxy resolves this problem, but the application you use (eg. the web browser) needs to be aware of the procedure.
Use the following command:
$ ssh -D 2000 login.uio.no
The port number (here: 2000) is rather arbitrary, but must be above 1024, and not used by somebody else on your computer (or you'll get an error message).
Note for windows users: In putty, this can be done by selecting a "Dynamic" port.
Now you need to tell your network browser to use this local port as a SOCKS5 proxy. With Firefox, this is set under Preferences -> Advanced -> Network -> Connection (Settings). Choose Manual proxy configuration, and set localhost as SOCKS Host using port 2000 (or whatever you chose with ssh). Make sure SOCKS5 is checked below.

That's it. You can now access services like Scopus as if you were on the UiO network. Try visiting www.whatsmyip.org to see how your IP number now appears to be one of the nodes behind login.uio.no (most likely 129.240.144.52 or .36).
If you want to keep a separate browser session with SOCKS proxying, you can create a new Firefox profile. Start firefox in a (local) shell like this:
$ firefox -no-remote -ProfileManager &
This way, you don't need to run the ssh command every time you want to browse the net.
For other applications, try searching the net for the application name and "socks5", eg: http://google.com/?q=chrome+socks5 .
Automating tasks
If you have batch scripts, cron jobs or other unattended tasks that need to use ssh (or rsync, sshfs, etc), you can set yourself up with keys to make this function also without you being present to type in passphrases. The best way to do this will depend on a few things, but this section offers some suggestions.
Talking to the agent
If you have started the ssh-agent as described above and loaded up a key, it will be available to all processes started from this shell. This is because the environment variable SSH_AUTH_SOCK will be set, and its value directs ssh (and scp, etc.) to the socket that is used for communicating with the agent:
$ echo $SSH_AUTH_SOCK
/tmp/ssh-oIVHz14005/agent.14005

$ ls -l $SSH_AUTH_SOCK
srw-------. 1 hanspv hanspv 0 Nov  1 15:56 /tmp/ssh-oIVHz14005/agent.14005
We can see that this is indeed a socket-type file, from the 's' at the start of the ls output. Note that only the user has read/write-permission to the socket.
The problem arises when you run ssh from another shell (script), where this variable is not set.
It is possible to dig around in /tmp and figure out the name of the socket file, and set SSH_AUTH_SOCK accordingly.
However, a simpler approach is to start a special-purpose agent with a fixed socket name, eg:
$ mkdir -m 700 /tmp/mysockets.$USER
$ eval `ssh-agent -a /tmp/mysockets.$USER/ssh-socket`
$ ssh-add
Note that we provide the name for the socket file as we start up ssh-agent. The variable SSH_AUTH_SOCK will be set to point to this location, and we load up the key as usual. Note also that we create a private subdirectory below /tmp to hold the socket, and that we let our username be part of the directory name — there are other users on this machine, too.
You only need to run the above commands once, that is once after every reboot. You don't need to stay logged in.
As you now know the name of the socket file, your batch jobs (scripts) only need to hook up to this. Include something like this at the start of the script:
# Set socket name, check if we have a key:
export SSH_AUTH_SOCK=/tmp/mysockets.$USER/ssh-socket
if ! ssh-add -l > /dev/null ; then
  exit
fi
As can be seen, in the above example we simply exit the script if there are no keys. You might want to do something more elaborate, i.e. send yourself an email with the command-line mail (or mailx) utility.
Using an agent in a remote login
If you have started an agent on a remote server (eg. wessel) as suggested above, you might want to connect to it also in interactive login shells. Try something like this in eg. your .bash_login file:
# Connect to ssh agent socket, if it's there.
if [ -e "$SSH_AUTH_SOCK" ]; then
  # We already have a socket, so do nothing
  :
else
  export SSH_AUTH_SOCK=/tmp/mysockets.$USER/ssh-socket
  if ! ssh-add -l > /dev/null; then
    echo "No keys in agent. Try running ssh-add"
    echo "You might also need to create the directory and start the agent first:"
    echo "  mkdir -m 700 /tmp/mysockets.$USER"
    echo '  eval `ssh-agent -a /tmp/mysockets.$USER/ssh-socket`'
  fi
fi
You can of course make more elaborate tests to handle the different possibilities (no agent running, no directory, no key in agent), but this should do as a start.
As the shell commands above will create output (echo), be careful about putting this in your .bashrc
Using non-encrypted keys
If you don't know what machine your script will be running on (as on the abel cluster), the above procedure is less than ideal. If you use an unencrypted key, you do not need to type the passphrase or even run the agent, but you must make sure the key cannot be used for general logins.
You should make a special pair of keys for this purpose, eg:
$ ssh-keygen -f ~/.ssh/id_nonenc -C "Non-encrypted key for automated copying" # Hit Enter twice for empty passphrase
Note we use a different name for the keys, and a comment. Copy the public key to the remote machine, append it to ~/.ssh/authorized_keys as usual. Then, edit this file, eg:
remote$ nano ~/.ssh/authorized_keys
In the last line, you will find your key. Prepend coma-separated restrictions as to how the key can be used, as given in the sshd(8) manual page, or for instance here. The resulting (long) line would look something like this:
from="pingo.uio.no",command="/path/to/command options",no-agent-forwarding,no-port-forwarding,no-X11-forwarding ssh-rsa AAAA(this is the actual key...) Non-encrypted key for automated copying
Note the absence of space in the restrictions list, except in the quoted command. The from-field defines one or more machines that are allowed to connect. The command-field defines what command can be run, complete with command-line options. This can be tricky or impossible to get right, but for using rsync you might want to use rrsync, as described here.
If you have two or more key pairs available, you can specify which of them to use with the -i option to ssh. If you want to make sure that ssh won't stop to prompt for passwords or whatever, you can add -oBatchMode=yes, like this:
$ ssh -i $HOME/.ssh/id_nonenc -oBatchMode=yesremote.host
To make rsync use all these options, you'll have to use the -e option, like this:
$ rsync -av -e "ssh -i $HOME/.ssh/id_nonenc -oBatchMode=yes" remote.host:/my/work/directory /scratch/
These commands can be quite complex, but in a script it should be possible to get it right eventually. You can then edit a config file with the right options for this connection, see the next section.
The ssh config file
Many options for ssh can be set in the config file. Apart from the system-wide config file (usually /etc/ssh/ssh_config) , you can edit your own file in ~/.ssh/config. This is an ordinary text-file, and the format are stanzas like this:
Host name
  keyword = value
  keyword = value
The name is either a hostname or IP address, or a name of your own choosing. In the latter case, you'll have to provide the "real" hostname as a value to the HostName keyword. For example:
Host uio
  HostName = login.uio.no
  Port = 443
  User = hpverne
With this in my ~/.ssh/config, typing "ssh uio" would be equivalent to typing
ssh -p 443 hpverne@login.uio.no
You can use "*" as a wildcard in the Host statement, so you can for instance have a set of options for all hosts matching "*.uio.no". More general options should be placed last, perhaps with a "Host *" stanza.
In this way you can collect options you use frequently in one place, and save yourself some typing and possible mistyping. This is similar to saving options in a "session" for Windows/Putty users.
For a full list of possible options, and details on the semantics, see the manual page for ssh_config(5), or just google it.
Note that some options (keywords) that can be used in the config file have no counterpart for the command line, but you can enable them with the -o option. E.g. to make sure ssh will never prompt you for a password or passphrase:
ssh -oBatchMode=yes hostname
This is useful in scripts, in particular unattended scripts.
The options given in the ssh config file will usually work for other ssh programs too, ie. scp and rsync. Some ssh-based programs might use parts of it, but fail to recognize other parts.
Note: When trying out various ssh features, it could be wise to move the config file out of the way, or replace it with a test file with whatever options you want to try. Otherwise, different config or command line options might interfere with each other.
ProxyJump
Logging in to a UiO Linux machine is only permitted from the UiO network, with login.uio.no, mimi, and pingo as the exceptions. To log in from other networks (e.g. your home computer), you need to use a server as a "jumphost". For example, to log in to my desktop machine tai.uio.no from my home machine, I would need to do:
ssh -J hpverne@login.uio.no hpverne@tai.uio.no
I can specify this in my config file (on my home computer):
Host *.uio.no !login.uio.no
        User hpverne
        ProxyJump hpverne@login.uio.no
Then, simply typing "ssh tai.uio.no" will work as expected.
For more elaborate examples, including how to set this up with putty, consult USIT's (Norwegian) page.
You will be asked to type your password twice, unless you have a key loaded up in an agent.
Unstable network
Unfortunately, ssh is not very forgiving if the network is jittery. This is usually not a problem on the cabled network on campus, but is more often the case on wifi, or on home networks. The connection will break, and sshfs mounts will need to be unmonted before they are remounted (see above).
I know of no simple fix for this, and googling the problem will give you a fair lot of possible solutions. One that in my experience can be helpful is to add the following to the end of your .ssh/config:
# General defaults at the end
Host *
  ServerAliveInterval 60
Mosh
For interactive use, mosh can be a nice alternative to ssh. Mosh ("mobile shell") is far less vulnerable to network hiccups, and will keep the login session if the connection is jumpy, or even if you move your machine from one network to another (e.g. by going from cabled net to wifi).
Mosh is available for Mac and most Linux distributions, and can be run as an extension in Chrome for Windows, see the homepage for details.
You use it just like ssh:
$ mosh login.uio.no
Actually, mosh uses ssh for an initial authentication phase, so e.g. your keys work as expected.
Note that unlike ssh, mosh can't be used as a network engine to run other services on top (like sshfs, x2go, rsync, etc). Also, you can only use mosh against certain servers like login.uio.no, wessel, and mimi, usually not your desktop machine.
Further Reading
There are many other possibilities with ssh. A few useful texts would be
- USIT also has some SSH guides (mostly in Norwegian).
- SSH Examples, Tips & Tunnels, from hackertarget.
- SUSO SSH Tutorial for Linux
Administrator Tasks
Unless you are an admin, this will not be so useful to you...
Running sshd on a non-default port
Running sshd on port 80 and/or 443 will enable users to connect even when behind over-zealously configured firewalls that block the default port, 22. This section explains how to configure this on the server. Port 443 is used as an example.
Note: Ports 80 and 443 are normally used for http/https (and are therefore usually open in firewalls). Obviously, don't use these ports on machines that will be web servers!
Note 2: At UiO, this will work on servers only, as most ports are blocked on client networks. (It will work between machines on the same client net, which is pretty pointless.)
On RedHat EL 7, do the following as root:
Add the following lines to /etc/sysconfig/sshd :
# Run sshd on both port 22 and 443:
OPTIONS="-p 22 -p 443"
Make sure the port is opened in the firewall:
firewall-cmd --zone=public --permanent --add-service=https
firewall-cmd --reload
Restart the sshd server:
systemctl restart sshd
Chances are that this is not sufficient to make it work. Check the system logs (systemctl), find the time for the sshd restart, there will likely be a message from SELinux about denying sshd the use of this port, and also how to permit it. Possibly, it will be the following commands:
ausearch -c 'sshd' --raw | audit2allow -M my-sshd
semodule -i my-sshd.pp
Mosh
To enable mosh on a RHEL7 server, install the program and configure the firewall:
yum install mosh
firewall-cmd --zone=public --permanent --add-service=mosh
firewall-cmd --reload
To permit connections from outside UiO, the server needs to be on a "category 1" network that allows UDP connections to the relevant ports.